| « Overcoming Access Switchboard Limitations | Thankful for Good Vision » |
Customizing the Access Switchboard
This is the first of possibly multiple posts on the Microsoft Access Switchboard. In the next few entries I will look at the design of the menu, editing of the code for more functionality, and possibly discuss my development of an alternate menu editor. I begin with the design.
Microsoft Access comes with a feature that allows developers to create menus, or Switchboards, for the functions in the database. I use this feature all of the time, although I don't see many other Access programs that do. Learning how to use this, or a variation of it can save some development time and add to functionality of an Access database. The standard Switchboard, however, needs a few enhancements to make it look and work better.
Preliminaries
The Switchboard in 2007 and later is somewhat less flexible. First, it is designed as a continuous form, which is not as well suited for design. That also makes it difficult to design as a standalone element. Additionally, this one uses VBA code instead of the newer macros. In order to get the older VBA switchboard I create a Switchboard in 2003 blank database format and import it into the current database.
- Create a mdb database - Location, select *.mdb (or just import from a previously created mdb).
- Select Database Tools tab, and then Switchboard Manager.
- Access will prompt if you want to create a new switchboard. Say Yes.
- Save/Close the database
- Open the database you want to use the Switchboard in
- Import the Switchboard form and the Switchboard Items table.
I love tabs in browsers but in Access I like to use windows instead of tabs, especially if there is little to show. If your version defaults to tabs you can change it by going to Access Options and select Overlapping Windows. While you are there, you can set the form that automatically opens when you start the database to Switchboard.
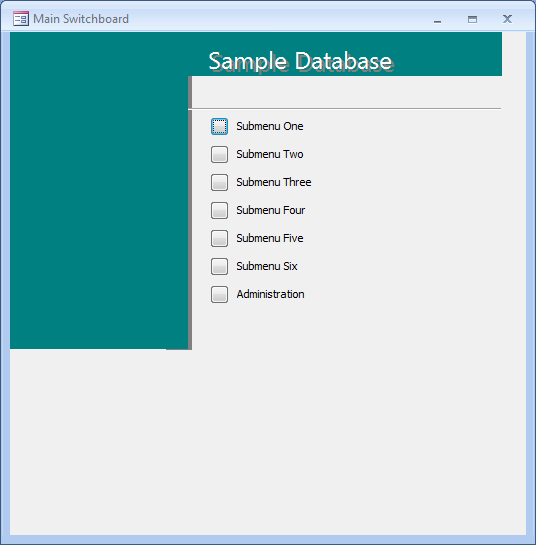
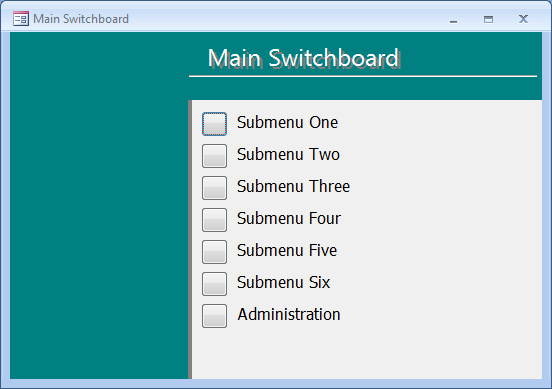
Try the Switchboard by opening the form Switchboard. Add items to it from the tab Database Tools > Switchboard Manager. The following is one I created with some dummy entries for demonstration purposes.
Designing the Switchboard Menu
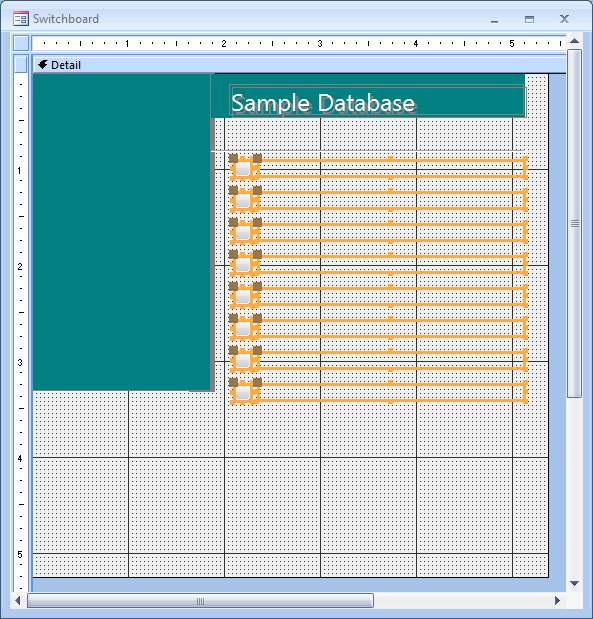
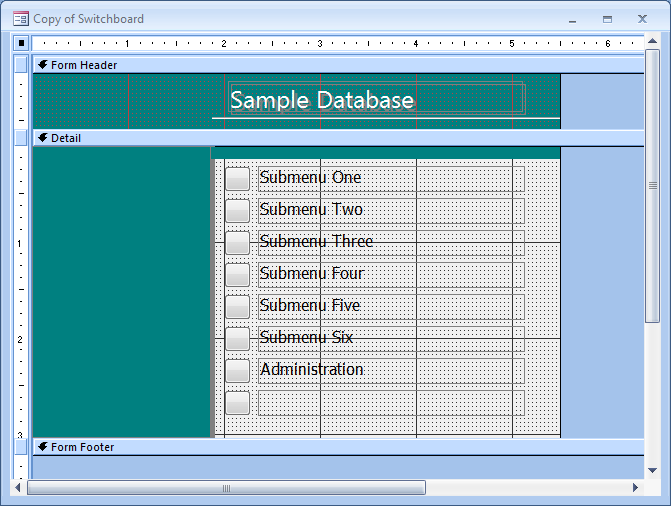
The Switchboard is a form just like any other, with some code behind it. To change the design, colors, spacing and fonts simply go to design mode from Home > View > Design View. One of the things I always do when starting a project and its Switchboard is to make the option selections much bigger. Follow these steps to resize the options and buttons.
- Select all of the options and buttons
- Increase vertical spacing
- Resize by dragging the bottom resizing handle
- Deselect and select all of the buttons
- Resize by dragging the resize handle to the left until they appear square
- Deselect and select only the options on the right
- Change the size to 12 point
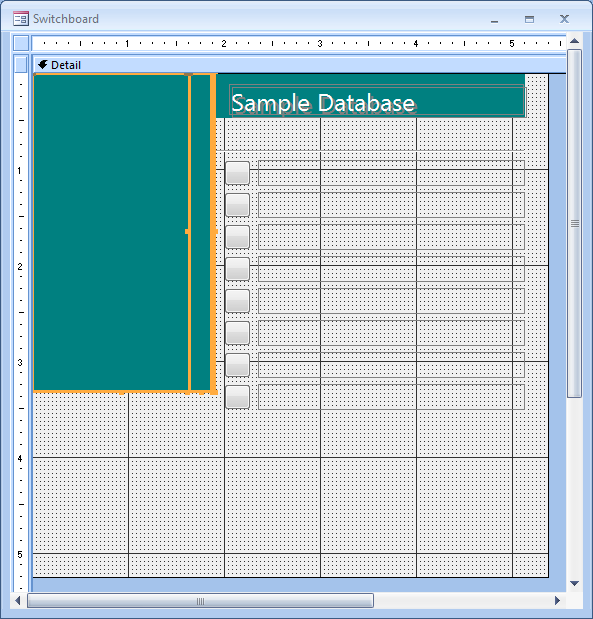
Next, the color background images need to be adjusted to fit the enlarged options.
- Select the left rectangular 'border'
- Resize by dragging down to just below the bottom option
- Drag the bottom canvas resizer up to meet the left border
- Do the same for the top right border.
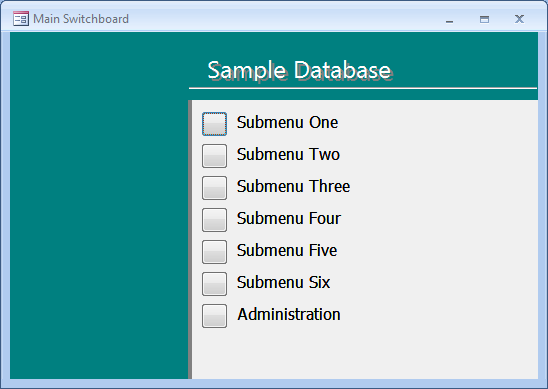
Except for the option buttons that should be in order, arrange elements like you want them. I haven't done it here but you will very likely want to use colors that match the rest of the forms you are using. The left side might be a good place for a company logo, or it could be eliminated altogether if you wish. Squeeze in the bottom and side and view the form in Form View. Click on Size to Fit Form. Compare and smile.
Adding a Home Page Click
Web pages very frequently use the logo at the top of their web page to allow users to click and return to their home page. You can do that here as well. There are several ways, but the one that I use does not have some of the side effects of using a clickable label in the header.
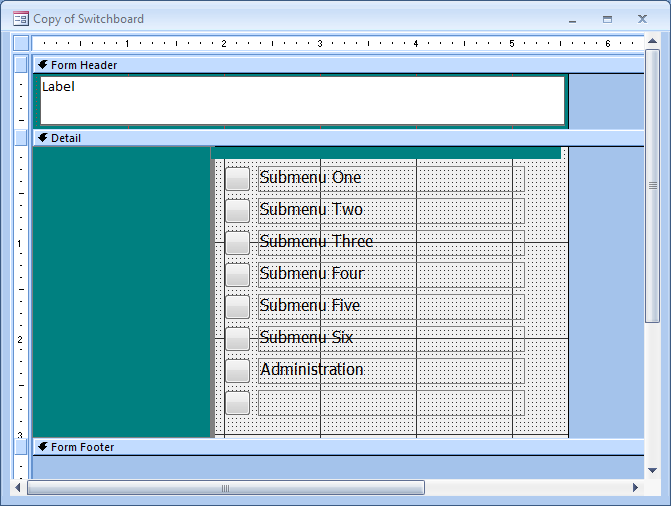
First right click on the Detail bar and select Form Header/Footer. Then expand the Form Header and select the Heading (Sample Database), its shadow, and its underline and move them up into the Header. Use Shift Click to select/deselect multiple items. Change the back color to match the lower border elements. Move the Detail elements up to fill the space.
Add a large label to the Header section with any text, and then set the fore color to the same color as the background. Back Style defaults to Transparent which is what we want here. Then make sure to arrange it so that the label is on top. Close the Form Footer area.
Me.Filter = "[ItemNumber] = 0 AND [SwitchboardID]=1"
Now when the user clicks on the menu's header, he gets redirected to the Main Switchboard. Of course, you could also use buttons or add any other navigation feature.
Form Title
The form for the Switchboard out of the box has a static label in the header, that has something like the Company name, or in this example, Sample Database, that doesn't change from switchboard to switchboard. If you change the label to a textbox and set the Source to Itemtext, it will show the title of the menu in the header, like Main Switchboard, instead of just in the top border of the form. Of course, you will need to style it so it looks good, disable tabbing into it, and make sure it is behind the Logo.
One of the reasons that more developers do not use the Switchboard may be the seeming limitations of the feature. There are limited actions that you can execute with it and there is a limit of 8 items per Switchboard. With a little coding, some of these barriers can be overcome. Read about it in Overcoming Access Switchboard Limitations.
